 Skip to content
 In an era where connectivity is crucial, a reliable internet connection is essential for both work and leisure. TP-Link router extenders are designed to enhance Wi-Fi coverage, ensuring that every corner of your home or office has a strong signal. However, users sometimes encounter issues when trying to connect their laptop or computer to the TP-Link extender. If you’re facing this problem, don’t worry—help is at hand. This blog post will guide you through troubleshooting steps to resolve connectivity issues and introduce you to professional support services from MyWiFiLogon.com.
Common Issues and Solutions
1. Check the Extender’s Placement
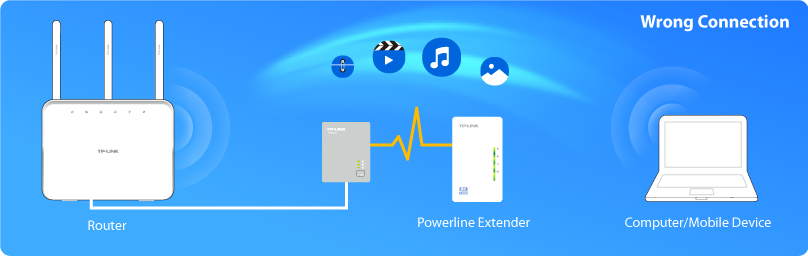
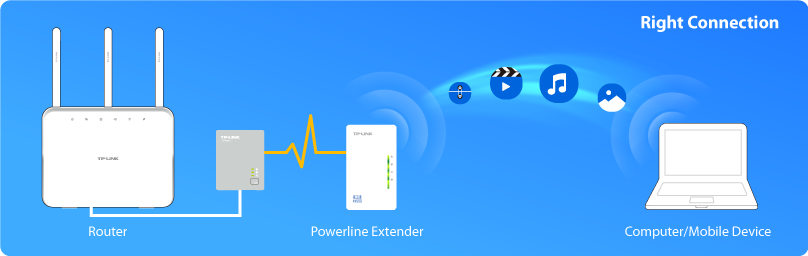
One of the most common reasons for connectivity issues is the placement of the TP-Link extender. Ensure that the extender is placed within the range of your main router and away from any physical obstructions or electronic devices that may cause interference.
2. Verify the Connection
- Power Cycle: Sometimes, simply restarting your devices can resolve connectivity issues. Turn off your TP-Link extender, router, and laptop/computer. Wait for a few minutes before turning them back on.
- Ethernet Cable: If you’re using an Ethernet cable, ensure it is securely connected to both the extender and your laptop/computer.
3. Update Firmware
Outdated firmware can lead to connectivity issues. Check the TP-Link website for the latest firmware updates for your extender model and follow the instructions to update it.
4. Correct Network Settings
- SSID and Password: Ensure that your laptop/computer is trying to connect to the correct SSID (network name) and that you are entering the correct password.
- IP Address: Make sure your laptop/computer is set to obtain an IP address automatically.
5. Reset the Extender
If all else fails, you can reset your TP-Link extender to factory settings:
- Press and hold the reset button on the extender for about 10 seconds.
- Once reset, reconfigure the extender using the TP-Link app or web interface.
Detailed Troubleshooting Steps
1. Accessing the Extender’s Web Interface
- Connect your laptop/computer to the extender’s Wi-Fi network.
- Open a web browser and enter the extender’s IP address (commonly 192.168.0.254) into the address bar.
- Log in using your TP-Link credentials. The default username and password are usually “admin”.
2. Reconfiguring the Extender
- Follow the on-screen instructions to reconfigure the extender.
- Ensure that it is set up to extend your main Wi-Fi network.
3. Checking for Interference
- Avoid Microwave Ovens: Keep the extender away from devices like microwave ovens, which can interfere with the Wi-Fi signal.
- Distance from Main Router: Make sure the extender is not too far from the main router. An optimal location is halfway between the router and the area where you need better coverage.
Seeking Professional Help
If you’ve tried all these steps and your TP-Link router extender still won’t connect to your laptop or computer, it might be time to seek professional help. MyWiFiLogon.com offers expert support to resolve connectivity issues swiftly and efficiently. You can reach their dedicated support team at +1-800-413-3531 for personalized assistance.
