 Skip to content
 Expanding your Wi-Fi coverage at home or in the office has never been easier, thanks to the Netgear WN3000RPv2 Wi-Fi extender. Whether you’re struggling with dead zones or simply want to boost your signal strength, this step-by-step guide will walk you through the setup process. And remember, if you encounter any issues, you can always reach out to MyWiFiLogon at +1-800-413-3531 for expert support.
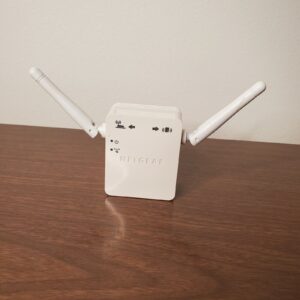
Netgear WN3000RPv2 Wi-Fi Extender Setup
Step 1: Unboxing and Inspection
- Start by unboxing your Netgear WN3000RPv2 Wi-Fi extender.
- Ensure all components are present, including the extender unit, power adapter, and installation guide.
Step 2: Choosing the Right Location
- Find an optimal location for your extender. It should be placed midway between your router and the area where you need better Wi-Fi coverage.
- Avoid obstructions and interference from other electronic devices.
Step 3: Powering Up the Extender
- Plug the extender into an electrical outlet in the chosen location.
- Wait for the power LED to illuminate, indicating that the extender is receiving power.
Step 4: Connecting to the Extender
- On your computer or mobile device, go to the list of available Wi-Fi networks.
- Look for the network named “NETGEAR_EXT” and connect to it.
Step 5: Opening a Web Browser
- Launch a web browser (e.g., Chrome, Firefox, Safari) on your device.
Step 6: Accessing the Extender’s Setup Page
- In the address bar of your web browser, type “http://www.mywifiext.net” and press Enter. This will take you to the extender’s setup page.
Step 7: Creating an Account
- If prompted, create a Netgear account or sign in with your existing one.
Step 8: Placing Your Extender Optimally
- Once the extender is configured, consider adjusting its placement for optimal coverage.
- Experiment with different locations to ensure the best signal strength.
Step 9: Verifying the Connection
- Check your devices to ensure they are now connected to the extended Wi-Fi network.
Step 10: Firmware Updates
- Check for firmware updates for your extender and apply them if available. Updated firmware can improve performance and security.
Step 11: Enjoying Extended Coverage
- Congratulations! You’ve successfully set up your Netgear WN3000RPv2 Wi-Fi extender, providing expanded coverage for your Wi-Fi network.
Common Netgear WN3000RPv2 Connection Problems
- Placement Matters: Ensure that your extender is located within the range of your router’s WiFi signal. Place it halfway between your router and the area with poor connectivity for the best results.
- Proper Setup: Double-check if you’ve followed the setup instructions provided in the manual. Sometimes, a simple reconfiguration can fix the problem.
- Firmware Updates: Outdated firmware can lead to connectivity issues. Visit the Netgear support website to download and install the latest firmware for your WN3000RPv2.
- SSID and Password: Ensure that the SSID (WiFi network name) and password on your extender match those of your router. Any discrepancies can cause connectivity problems.
- Signal Strength: Use the Netgear Nighthawk app or your device’s WiFi settings to check the signal strength of your extender. Weak signals may require repositioning.
- Reboot: Sometimes, a simple reboot of your extender can resolve temporary connectivity issues. Unplug it from the power source, wait for a few seconds, and then plug it back in.
- Security Settings: Ensure that your extender’s security settings match your router’s. Mismatched settings can cause connection problems.
- Factory Reset: If all else fails, you can perform a factory reset on your WN3000RPv2. Be aware that this will erase all your settings, so have your configuration details handy.
Security and Password
- Change the Default Password: When you initially set up your Netgear WN3000RPv2, it comes with a default username and password. The first step is to change this default password to something unique and strong. A strong password typically includes a mix of upper and lower-case letters, numbers, and special characters.
- Enable WPA2/WPA3 Encryption: The Netgear WN3000RPv2 supports WPA2/WPA3 encryption protocols. Make sure to enable this feature to ensure that your WiFi network is protected with the latest security standards. Avoid using outdated and less secure options like WEP.
- Firmware Updates: Regularly check for firmware updates on the Netgear support website or through the Netgear Genie app. Keeping your extender’s firmware up-to-date helps fix security vulnerabilities and enhances overall performance.
- Guest Network: If your Netgear WN3000RPv2 supports it, consider setting up a guest network for visitors. This network should have a separate password and limited access to your home network to keep your main network more secure.
- Disable Remote Management: Unless necessary, disable remote management of your extender. This prevents unauthorized access from outside your home network.
- Password Rotation: Regularly change your WiFi password. This can prevent unauthorized access from individuals who may have previously known your password.
- Use a Password Manager: To generate and store strong passwords securely, consider using a password manager. This ensures that you don’t forget your complex passwords and helps protect your network.
- Physical Security: Finally, ensure the physical security of your Netgear WN3000RPv2. Keep it in a safe location, away from potential tampering or theft.
Firmware Updates for your Netgear WN3000RPv2
- Improved Performance: Firmware updates often come with bug fixes, performance enhancements, and optimizations. These updates can boost your extender’s overall performance, resulting in faster and more reliable WiFi coverage throughout your home or office.
- Enhanced Security: Cybersecurity threats are continually evolving, and manufacturers release firmware updates to address vulnerabilities and improve security features. Keeping your firmware up to date ensures that your Netgear WN3000RPv2 is better equipped to protect your network from potential threats.
- Compatibility: As technology advances, new devices and standards are introduced. Firmware updates may include compatibility improvements to ensure that your extender works seamlessly with the latest routers and network equipment. This ensures that you won’t face connectivity issues with newer devices.
- New Features: Sometimes, firmware updates bring exciting new features or capabilities to your extender. These additions can enhance your network management experience and provide you with more control and customization options.
Updating the firmware on your Netgear WN3000RPv2 is a straightforward process. Here’s a quick guide:
How to Update Netgear WN3000RPv2 Firmware:
- Connect to the Extender: Ensure your computer or mobile device is connected to your extender’s WiFi network.
- Access the Web Interface: Open a web browser and enter the extender’s IP address (usually http://192.168.1.250) in the address bar.
- Log In: Enter your extender’s username and password (default credentials are typically “admin” for both fields).
- Check for Updates: In the web interface, navigate to the “Firmware Update” or similar section. Click on “Check for Updates” or “Check Now.”
- Reboot: After the update is complete, your extender will likely reboot automatically. If not, you can manually reboot it for the changes to take effect.
LED Lights
Here’s a breakdown of the LED lights on your Netgear WN3000RPv2:
- Power LED (Solid Green):
- A solid green power LED indicates that your extender is receiving power and functioning correctly.
- Router Link LED (Solid Green):
- When this LED is solid green, it means that the extender has a good connection with your router. This is the ideal state for seamless WiFi extension.
- Client Link LED (Solid Green):
- A solid green client link LED signifies that the extender is successfully connected to a WiFi-enabled device, such as a laptop or smartphone.
- WPS LED (Blinking Green):
- When the WPS LED blinks green, the extender is in WPS (Wi-Fi Protected Setup) mode, ready to connect with other WPS-enabled devices.
- Device Link LED (Solid Green):
- This LED, when solid green, indicates that a WiFi device is successfully connected to the extender.
- Status LED (Solid Green or Amber):
- A solid green status LED suggests that your extender is working correctly.
- A solid amber status LED might indicate a problem. You can consult the manual or Netgear’s support resources for troubleshooting steps.
- Factory Reset Button (Press and Hold):
- To perform a factory reset on your extender, press and hold the factory reset button until the status LED blinks amber.
Remember, if you encounter any issues during the setup process or need further assistance, don’t hesitate to reach out to MyWiFiLogon at +1-800-413-3531. We’re here to ensure your Wi-Fi extender is working at its best, so you can enjoy seamless connectivity. Say goodbye to Wi-Fi dead zones!
